CISCO Identity Services Engine
802.1X and TACACS+ Configuration Lab
Introduction
Purpose
The purpose of this guide is to get you to a point where you have a fully working AD integrated ISE Lab that you can use for whatever you like. For me the purpose of this build was to get an understanding of what ISE had to offer, what enhancements could be had in comparison to say NPS, moving forward I will use the lab to test POC scenarios, and generally just get a better understanding of what I can achieve with this amazing product.
Presumed knowledge;
Whilst this lab guide is fairly “follow the bouncing ball” there is some level of assumed knowledge;
Basic Cisco IP Networking knowledge
GNS3 Configuration
Basic Microsoft Windows Server and desktop skills
VMWare Workstation
Have a plan
Like anything in networking, planning is essential to success, even at a high level initially, create a rough, but documented topology like mine below, to map out how it will all connect together physically, this is important so you don’t mess up small details in your build;
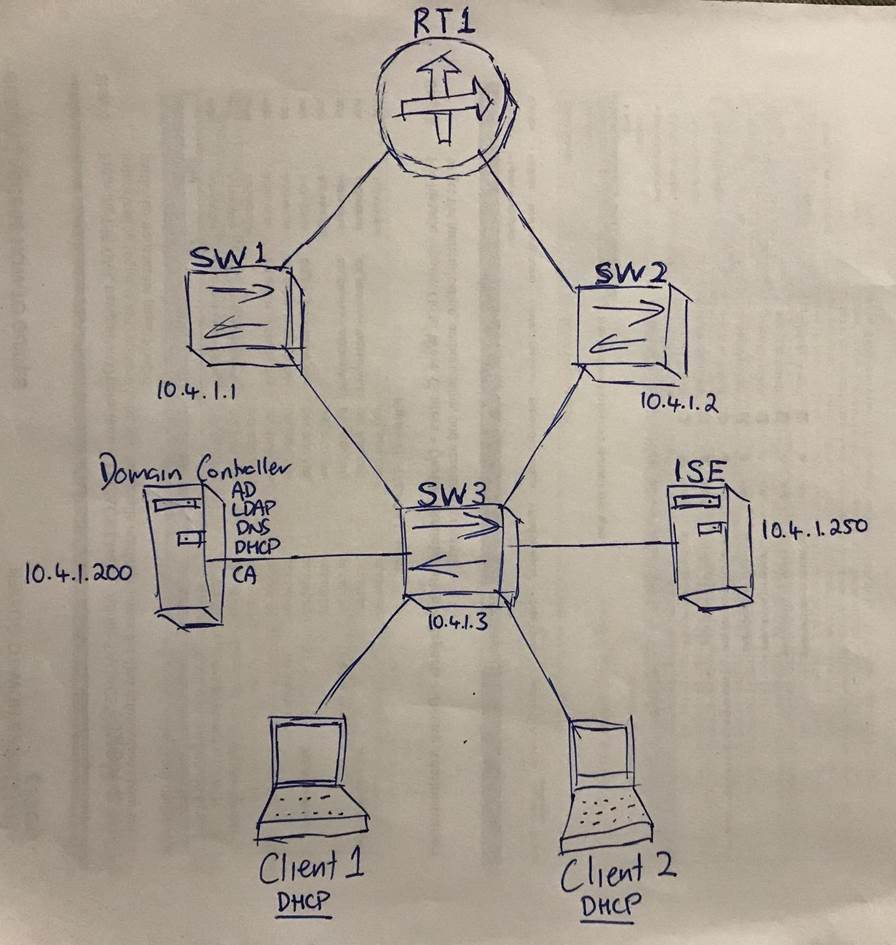
What you will need for this lab
A Host machine with at least 16Gb of RAM and i5 processor
GNS3 installed and working (www.gns3.com)
VMWare workstation (www.vmware.com)
Windows 10 64 bit image (www.microsoft.com)
Windows Server 2012 R2 image (www.microsoft.com)
Cisco ISE ova (www.cisco.com)
Cisco IOU layer 2 and layer 3 images (www.google.com)
Build Phase
VM Builds
Build the ISE VM
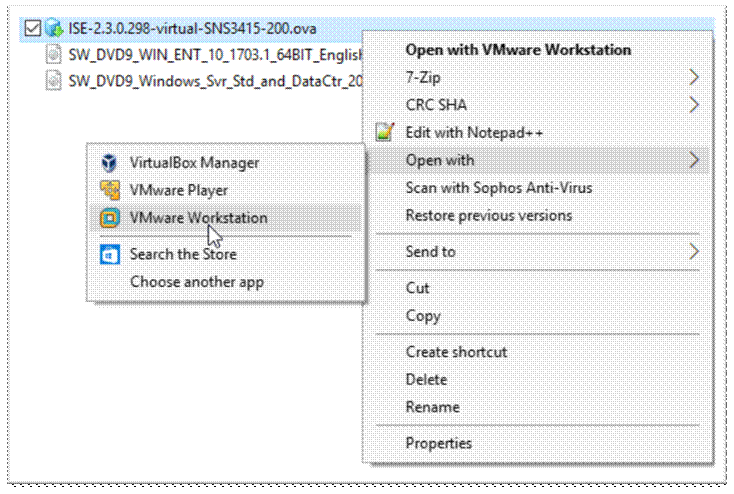
Second step is to build your ISE Server, right click on your ISE ova and open in VMWare workstation
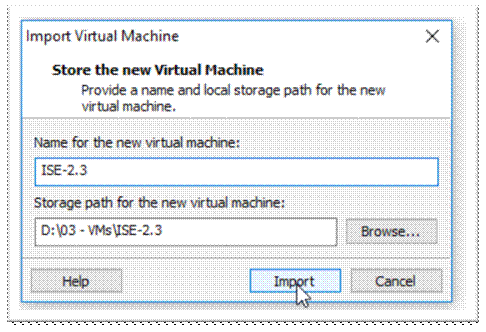
Change the name if you want and click “Import”
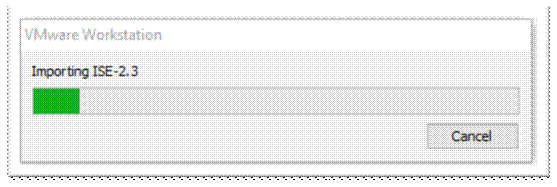
Wait for a while (about 5-10 mins on my i7/16Gb machine);
Build your AD Server
File è New Virtual Machine;
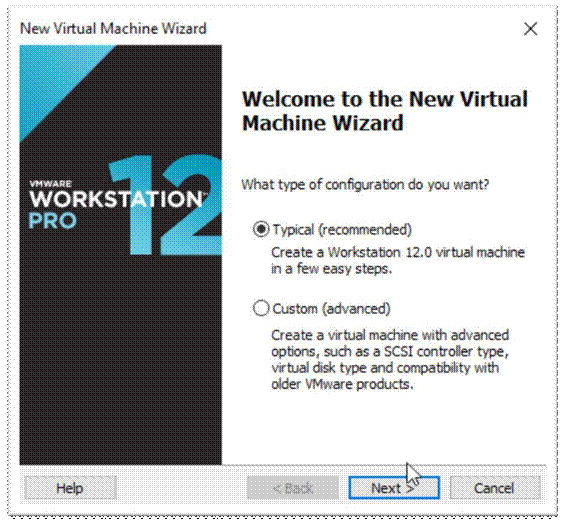
Browse to the machine image and click next;
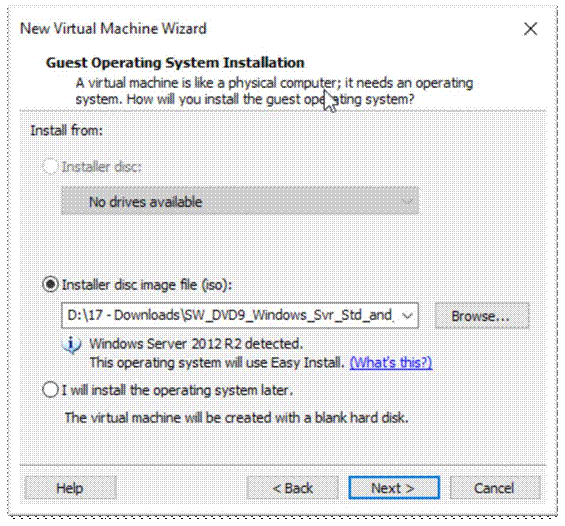
Enter an admin username and password for the Server, click next;
Rename if required, Next;
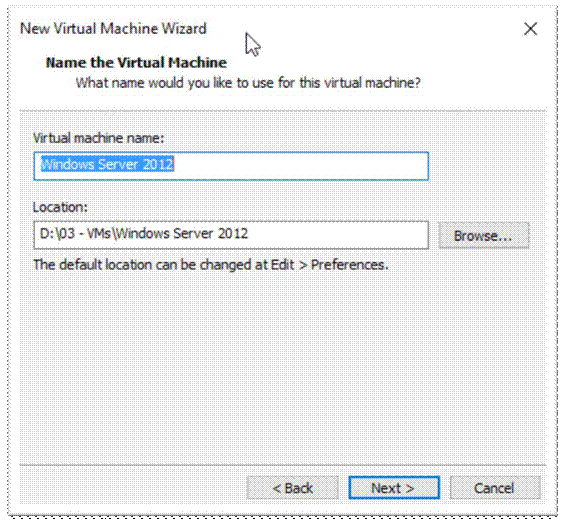
Adjust if necessary, Next;
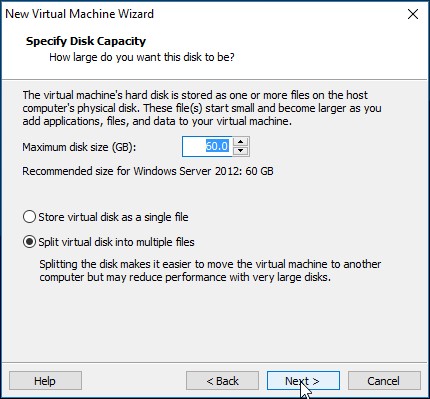
Finish, it will now go ahead and build the machine for you;
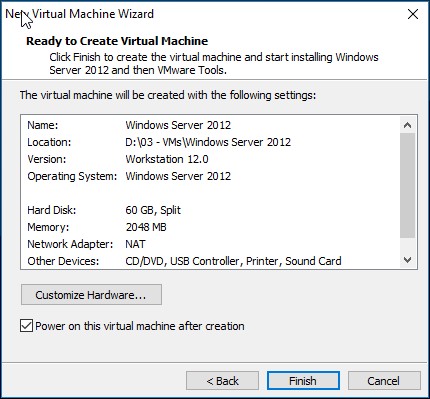
Build your minions (Clients)
Now you have to build some machines, so VM Build as per above (but with a win10 image, duh!) and when you are done, clone it so you have two of them, do a full clone not a linked clone!
GNS3 LAB Setup
Create your project
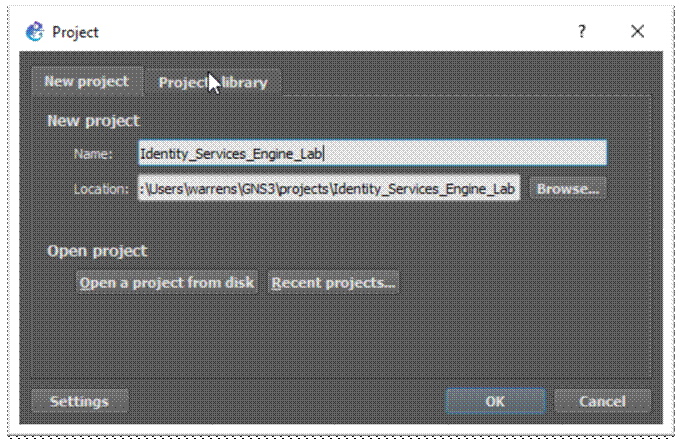
Create a project in GNS3 and Click OK;
I’m using the latest (at the time) stable build of GNS3 2.0.2 from m
Enable host VMWare NICs
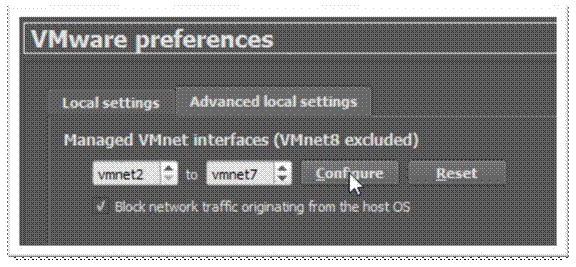
Make sure you have enabled the VMWare NICs under Preferences è VMWare
Add VMs to GNS3
Preferences è VMWare è VMWare VMs è New è Run on local è Select from list è Finish
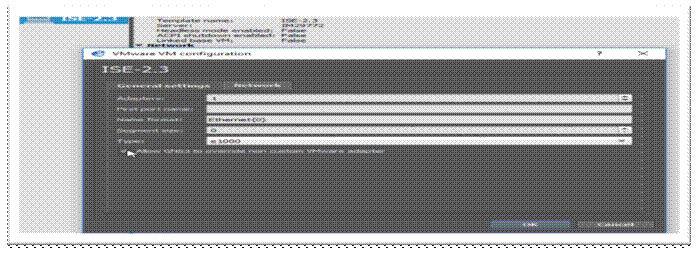
Then you need to edit the machine, click on the “network” tab and set the following;
Enable ‘Allow GNS3 to override…..’ click ‘OK’
Do this for all your VMs you have just created;
The AD Server
The Two Windows 10 Clients, and
The ISE VM
Build your Topology
Now, put it all in your project and connect it all together! Show interface labels and rename devices as you see fit.
Start everything one by one, except one of the windows 10 clients, that’s not needed just yet;
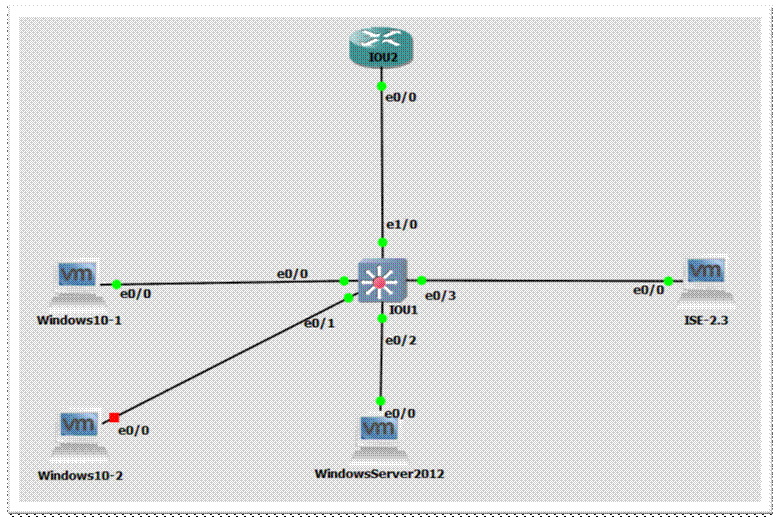
Address the network
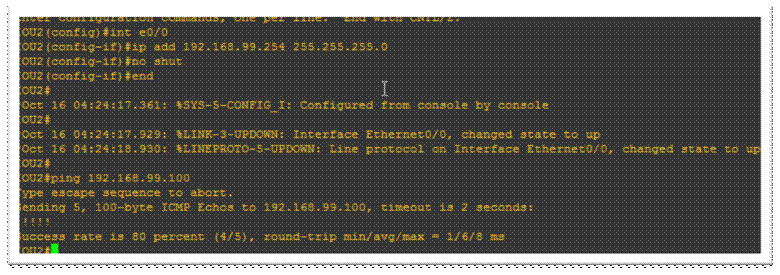
Console to the switches and routers, and assign an IP to VLAN 1 for simplicity (remember this is an ISE lab);

Test full connectivity between all your network devices;
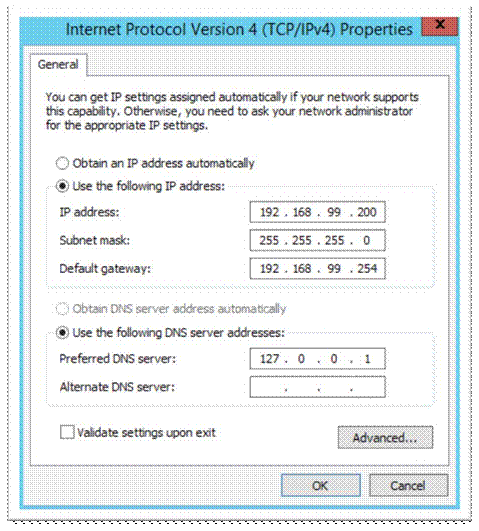
Jump on the windows Server and give it a fixed IP and local DNS as per your design;
Still on the server, turn off the windows firewall and Ping test to your network devices;


Configure SNMP
Jump on your network devices and configure SNMP, I use SNMPv3 in production, but for simplicity (as this is an ISE lab not a networking lab) I have used v2c here;
snmp-server community public RO snmp-server enable traps snmp-server host 10.4.1.250 version 2c public
Operating System Builds
Build the DC
Logon to the server and Add roles and features;

Next;
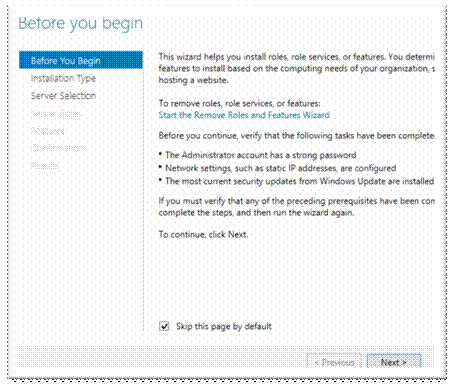
Role based, Next;
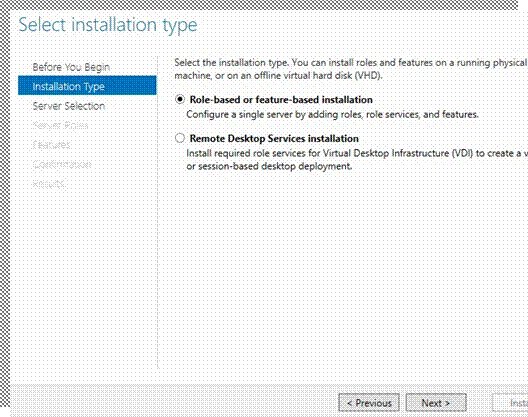
Yep that’s the one, Next;
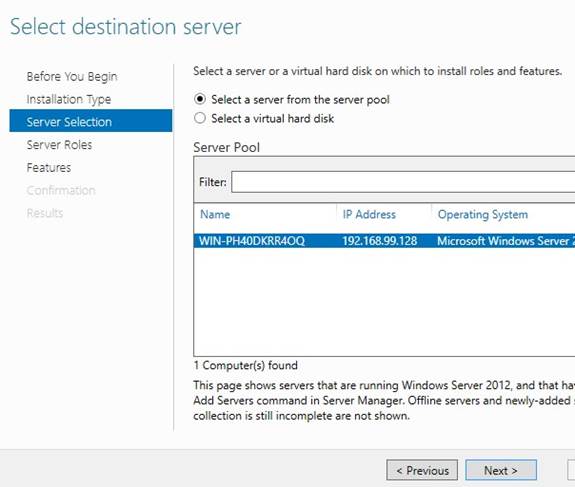
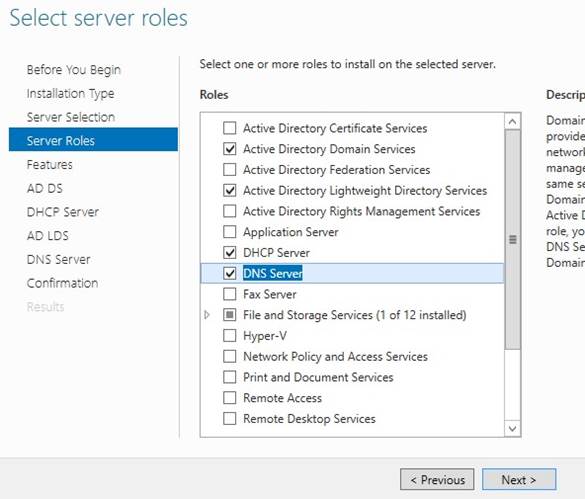
Select AD, DHCP, DNS and LDAP, click Next (accept all additional features as you go);
None, Next:
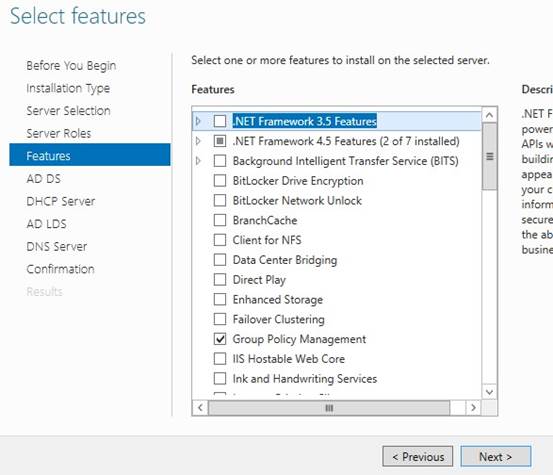
NextèNextèNextèrestart if requiredèInstall;
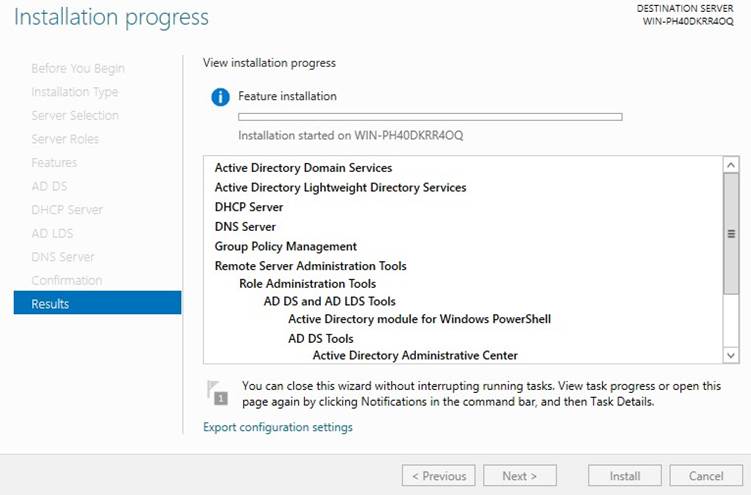
When finished, click ‘Close’:
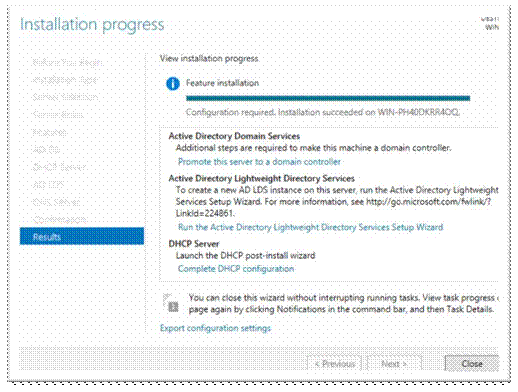
Now we need to promote the DC;
Go to Server manager, click on “AD DS” on the left and click on warning up top, click ‘More’;

Click on ‘Promote this server to…..’

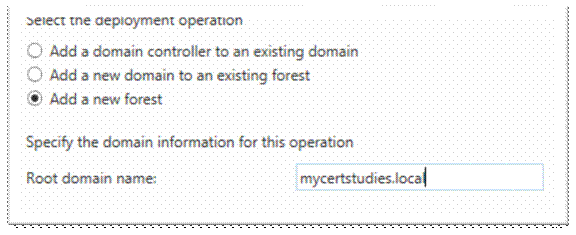
Add a new forest, enter the domain name and then click next;
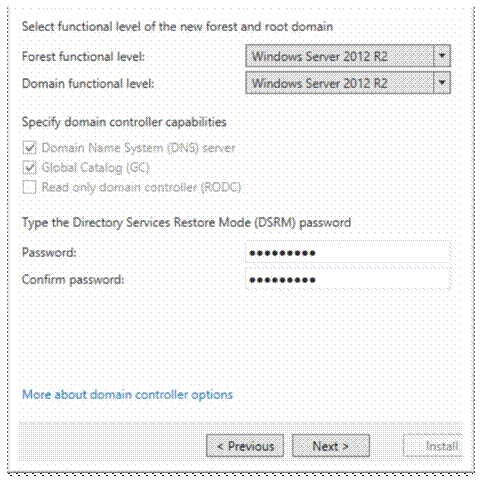
Forrest and Domain functional level to Win Server 2012 R2, enter a password twice and click next;
NextèNextèNext;
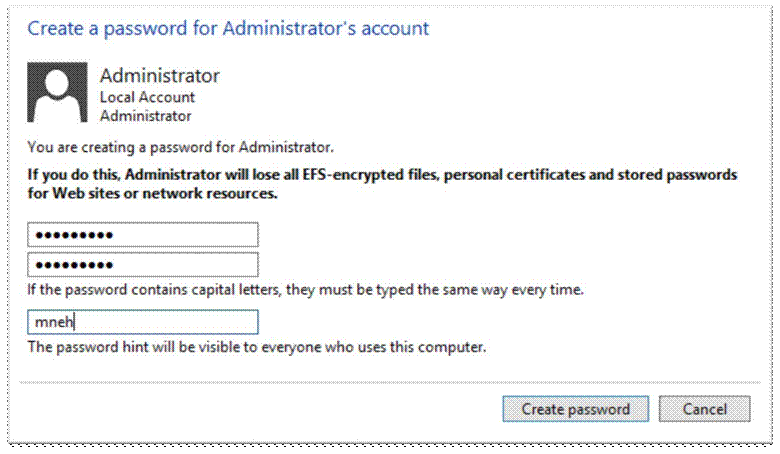
Fix this error by changing the default administrator’s password to something more complex than nothing;
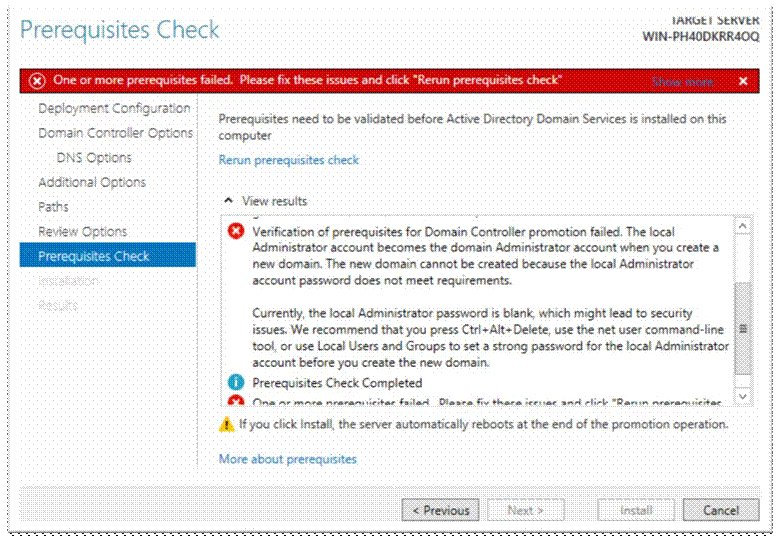
User accounts è Manage another account è Administrator è Create a password (enter a password)
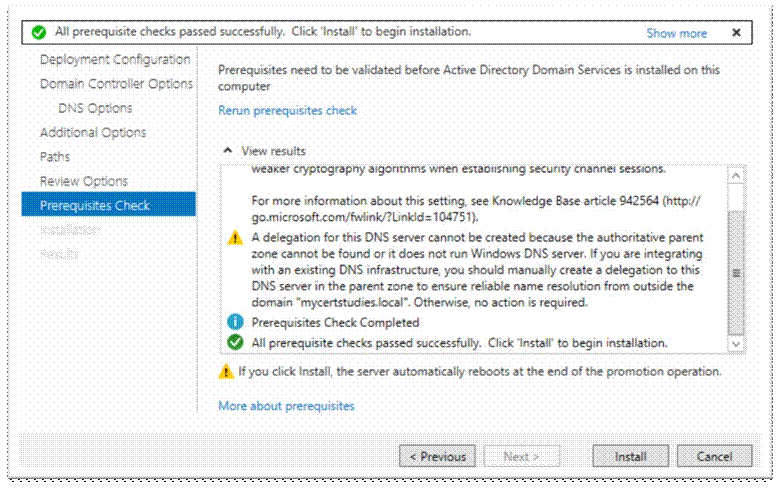
Rerun prerequisite check, and then click Install;
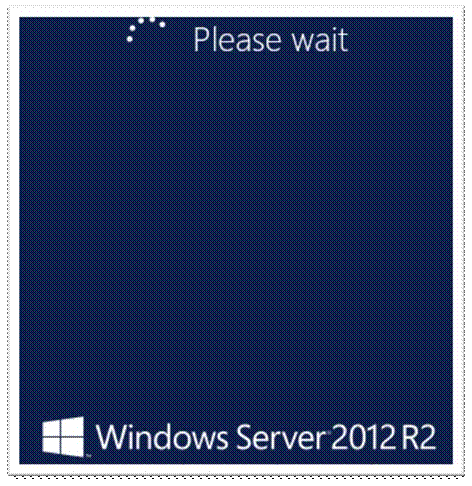
The Server will restart on completion J
Go back into ‘Add roles and features’ and add ‘CA Services’;
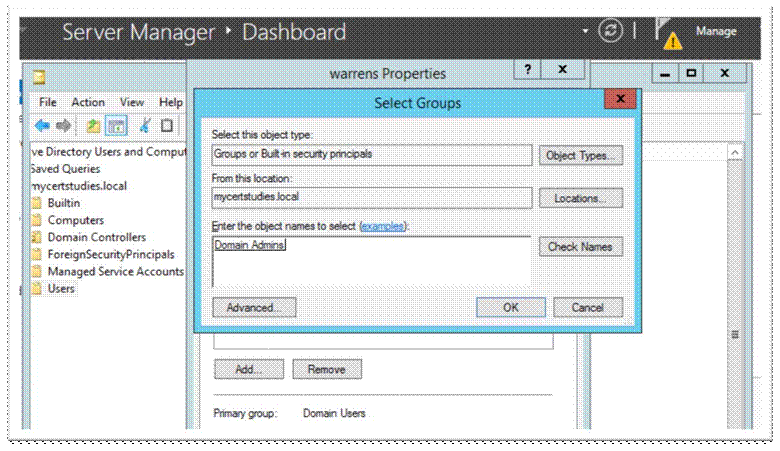
Psst, but first you have to give your user “Enterprise admins” privileges in order to start an Enterprise CA!
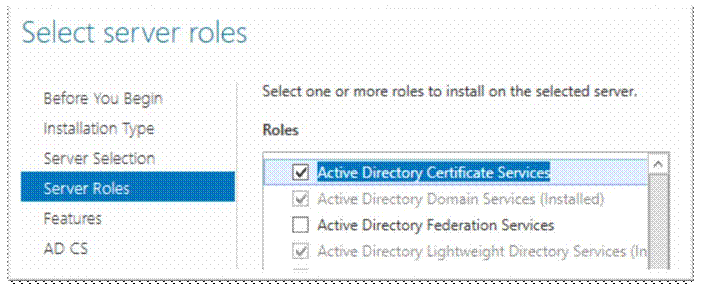
Check ‘AD CS’ and click next;
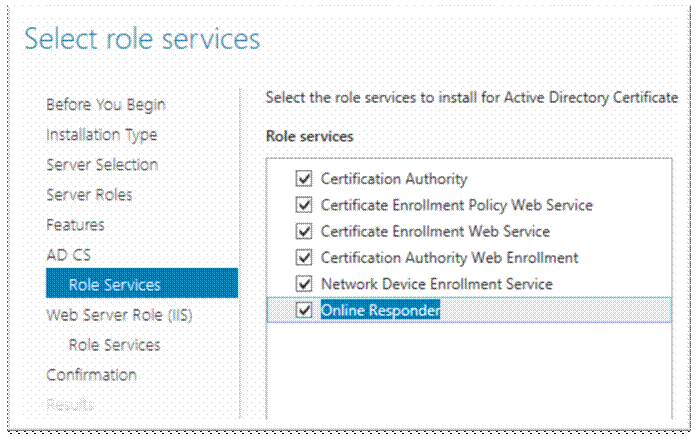
NextèNextèRole Services;
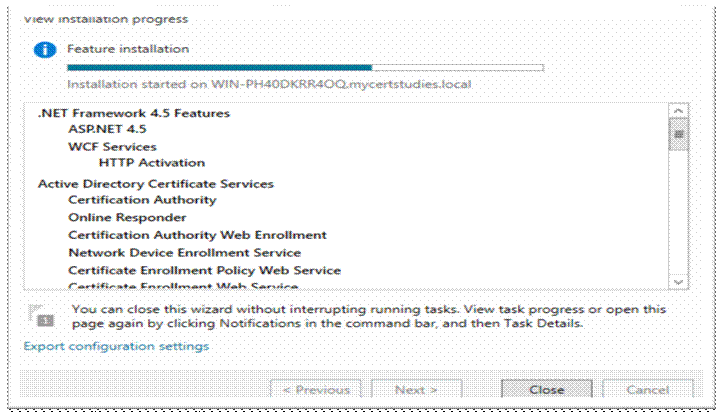
NextèNextèNextèInstall;
Now go back to Server manager, click on AD CS, click on the warning up the top, click ‘More’;

Configure active directory certificate services;
NextèNext, select the top 3;
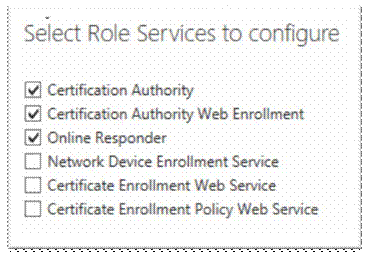
NextèEnterprise CAèNextèRoot CAèNew KeyèNextèNextèNextèNextèConfigureèCloseèNo
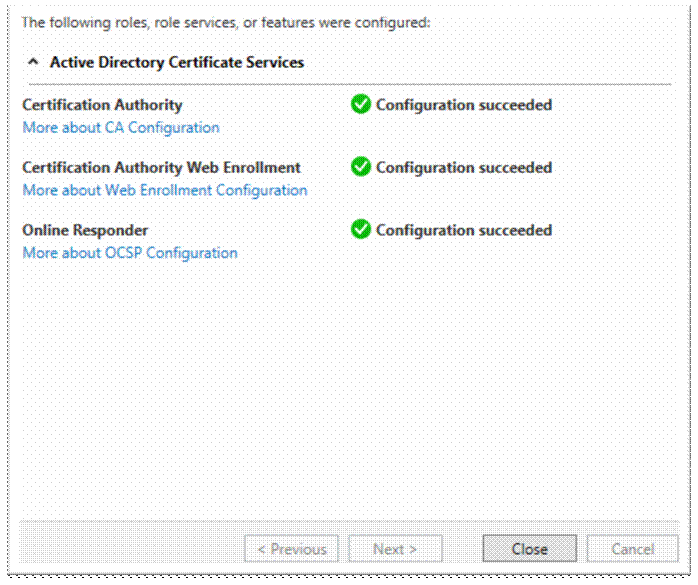
Now you have to go back into CA again and finish off the device enrolment services, but first of all make your user a member of IIS_Users group;
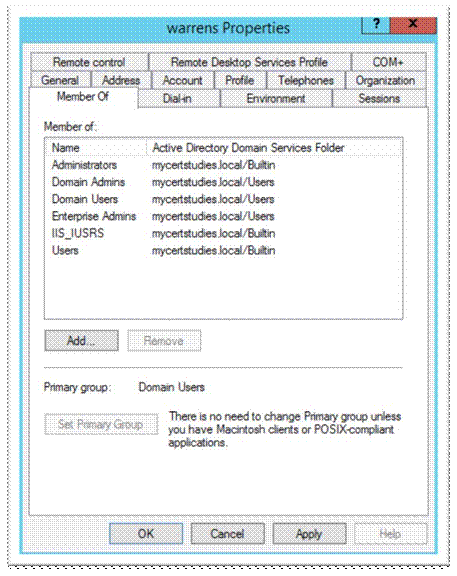
Then go into the CA under server manager, continue the installation of the CA, you will see a warning that configuration needs to be completed, select them all as below, and click Next;
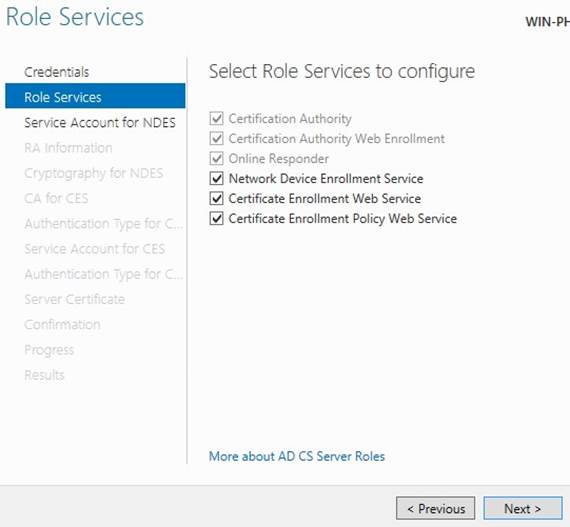
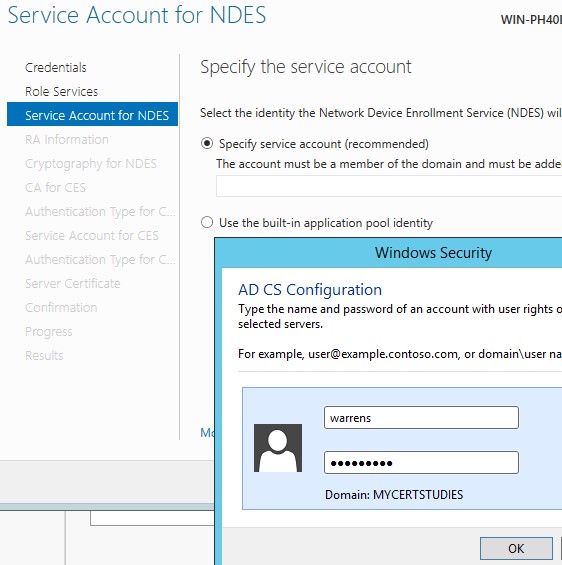
Now, enter your username and click OK;
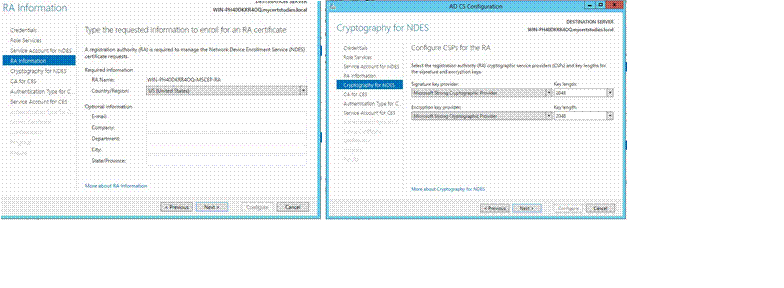
Next; Next;
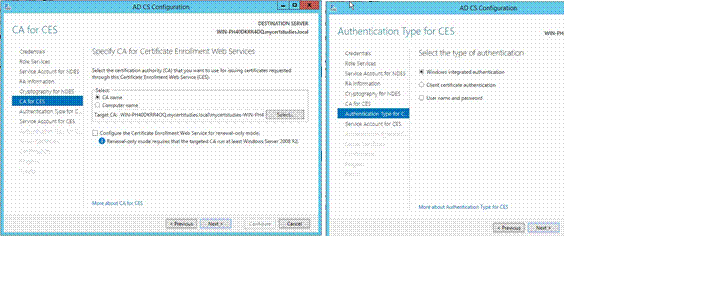
Next; Next;
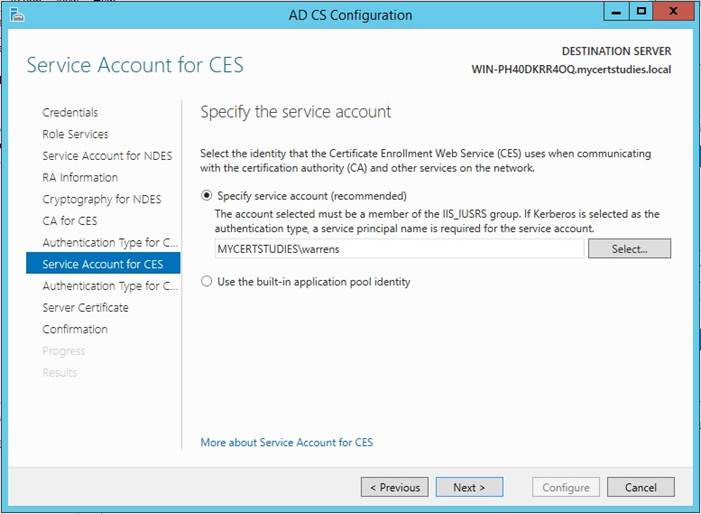
Enter service account, Click Next;
Select Certificate and click Next;
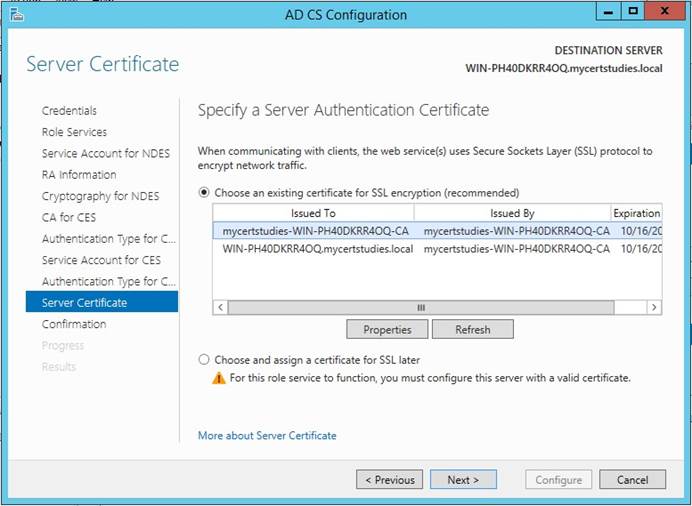
Check it, and click Configure;
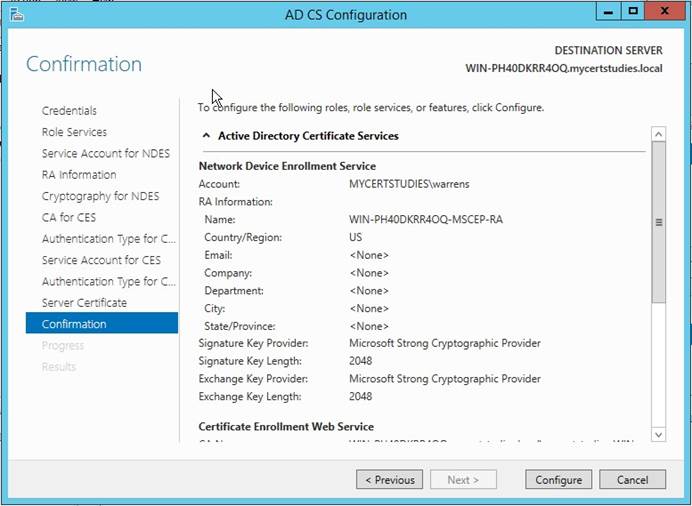
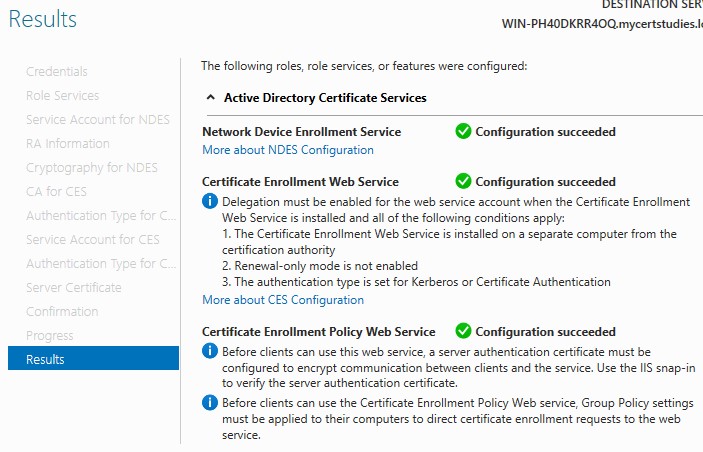
Wait for your results;
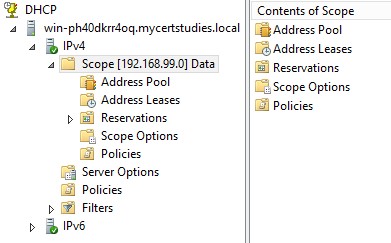
Now go in, finish the DHCP installation in a similar fashion to above, then create a scope for your Lab environment;
Then go into DNS and create an A record, then test it;
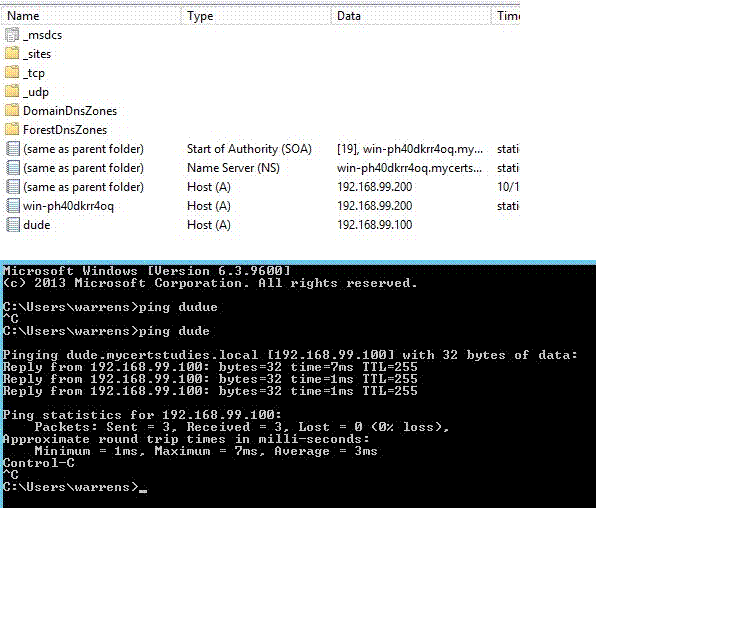
Join the clients to the domain
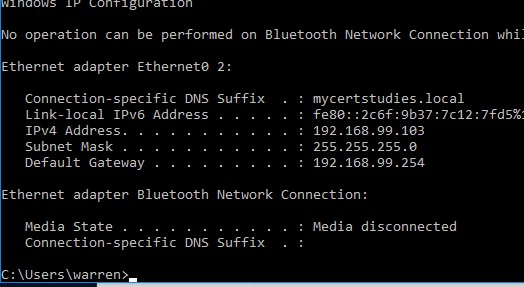
Make sure your clients are getting an IP from DHCP (in the correct scope);
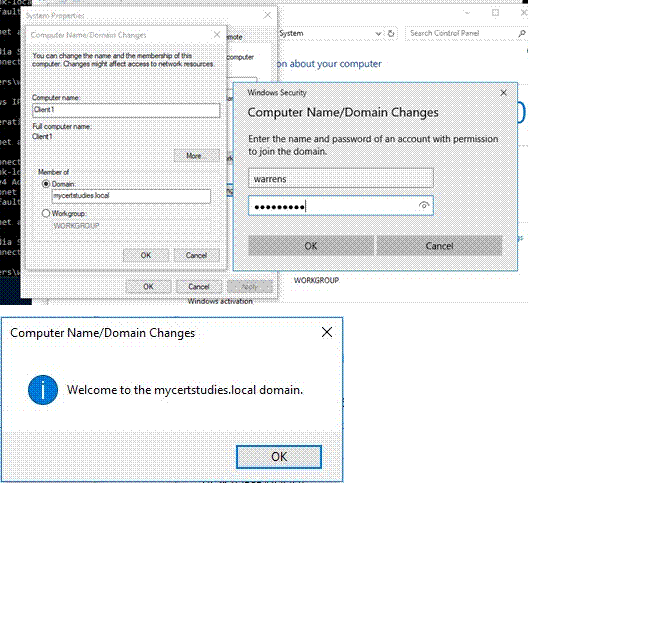
And join the domain!;
Build ISE
Now you have to do the initial config for ISE, start the VM;
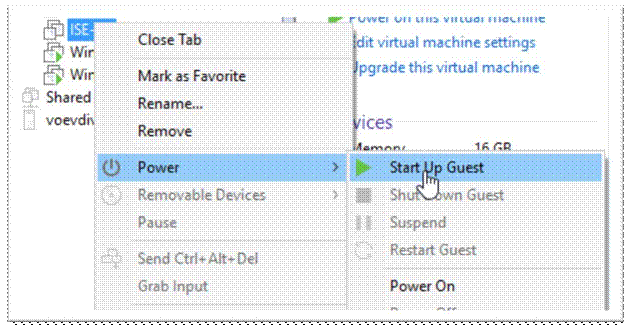
You will get this prompt a few mins later, Type ‘setup’ and hit enter (even though it is asking for a login)

You will be prompted for some initial setup information, enter as per your design;
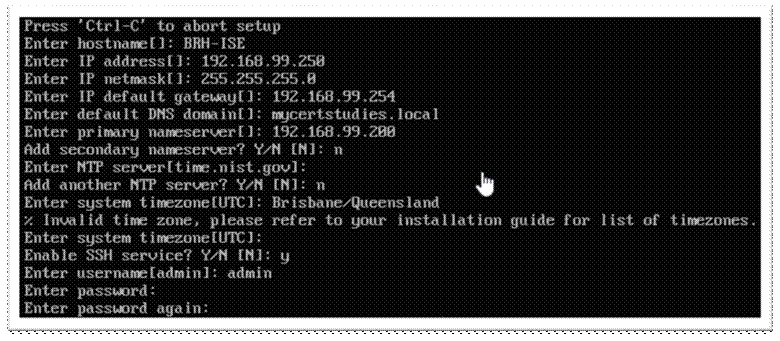
It will now go off and perform some system testing and report any issues to your console. After the tests are complete it will build the application, build the database and all that other stuff, it will take around half an hour, it will then end up at a login prompt, so grab a coffee! (or proceed to the next step to save some time)
Configuration Phase
ISE Base configuration
Web to ISE from your windows 10 Client;
![]()
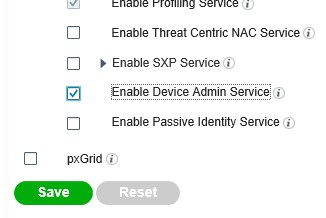
Goto AdminstrationèSystemèDeploymentèSelect ISE and enable the Device Admin Service, this enables TACACS+ on your ISE Server, click Save;
Now in the top right hand corner of the screen, click on the little play button then on the visibility scan;

Enter the IP range/s that you want to scan for endpoints and click Next;

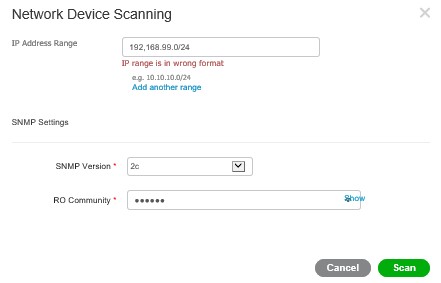
Next screen is where you scan for network devices, click on the ‘Scan’ hyperlink;
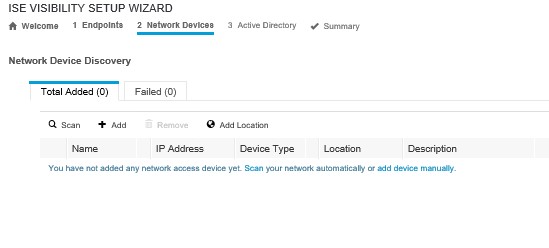
Enter the details for the subnet in ISE, and the SNMP details you configured on your network devices, then click ‘Scan’;
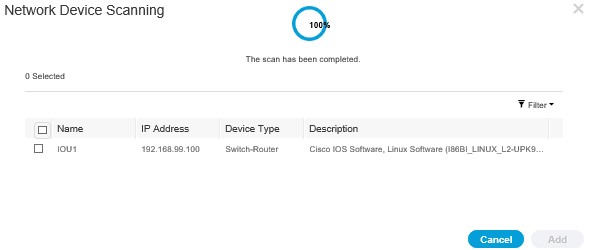
As you can see, a switch was found, select the device and click Add, then Next, you will be prompted for location information, enter this per device, pretty self-explanatory, again, click Next;
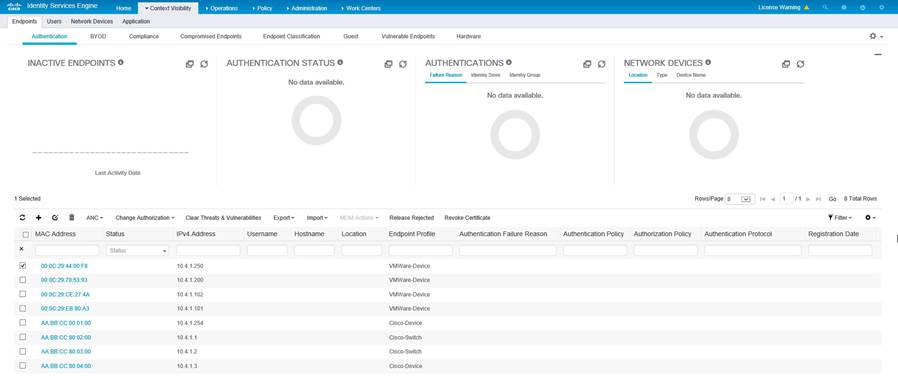
Skip the Active Directory step as it doesn’t work, then click Finish, you will be taken back to a Dashboard;
Domain Join ISE
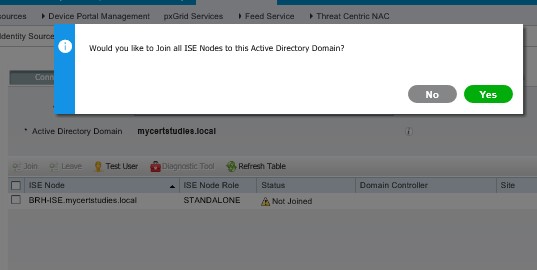
Goto AdministrationèExternal identity sourcesèActive DirectoryèAddèEnter detailsèSubmit;

Yes you want to join them all, Click Yes;
Enter domain admin credentials and click OK;
![]()
Certificate Authority Trust Import Root CA certificate
You need to import your root CAs Root certificate so your domain trusts your ISE implementation.
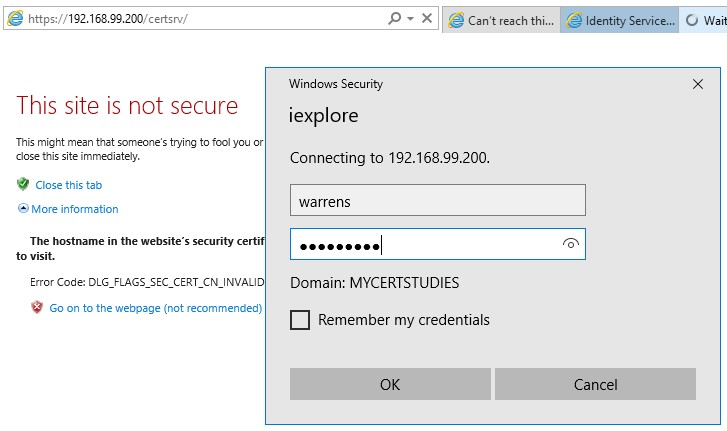
Navigate to https://[your-CA-address]/certsrv/ and login with your admin user;
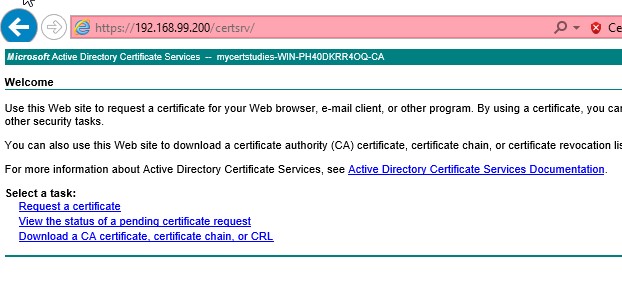
Click on the ‘Download a CA Certificate, certifica……’;
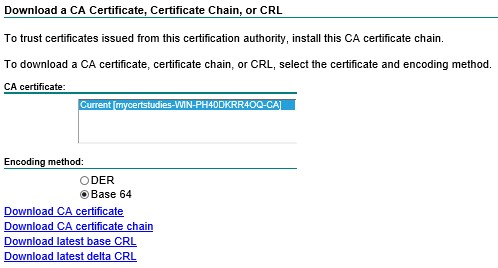
Select ‘Base 64’ radio button and click ‘Download CA certificate’ and save it locally;
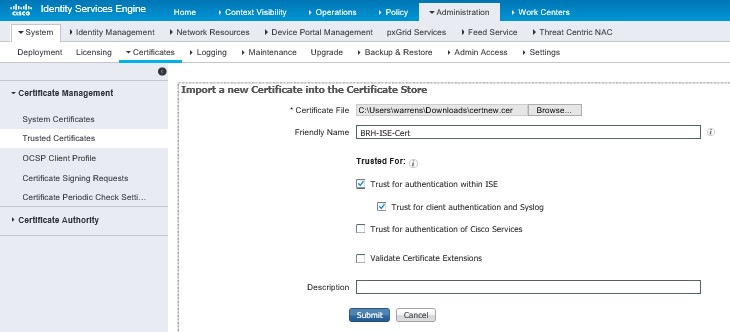
AdministrationèSystemèCertificatesèCertificate ManagementèTrusted CertificatesèImportèSelect your certificateèFriendly NameèCheck “Trust for client auth…” èSubmit;
Now you need to request a cert from your CA, this is for Dot1x EAP trust
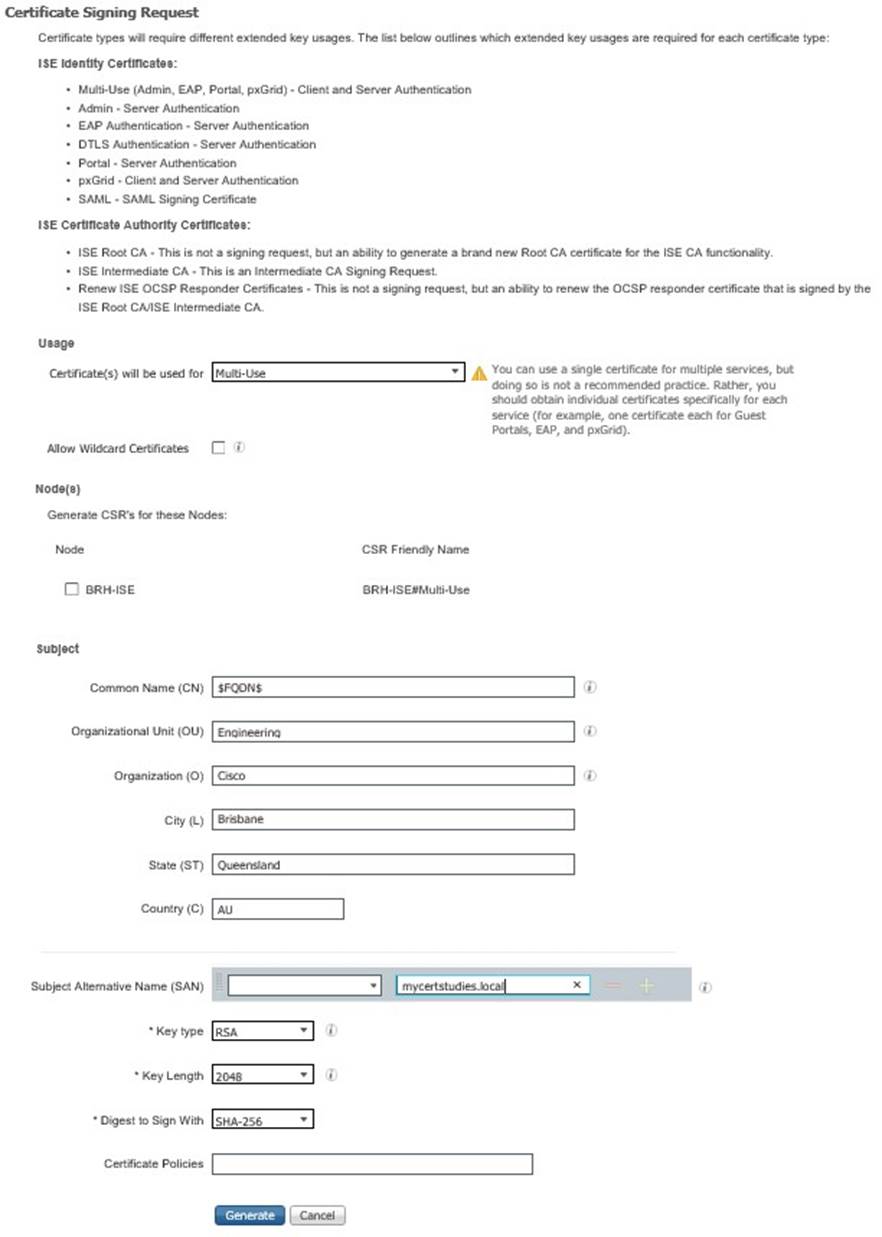
Goto AdministrationèSystemèCertificatesèCertificate Signing RequestèClick on Generate CSR;

Fill in the basic detail below and click Generate, then export, then save the .pem file locally;
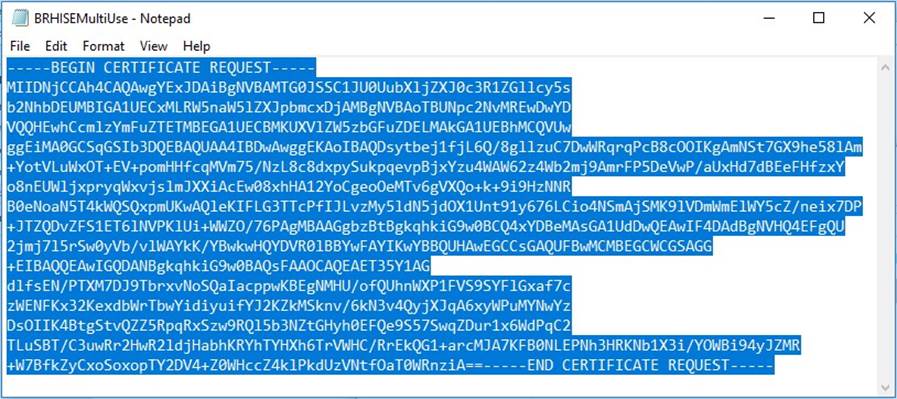
Now open the .pem file in notepad (make sure you select word wrap) copy the entire contents of the file;
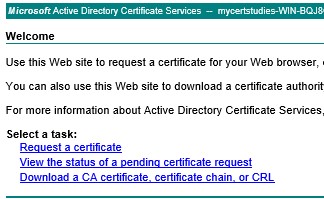
Go to your CA (https://[yourCAaddress]/certsrv/ click on request a certificate;
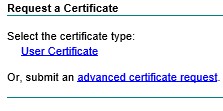
Now select advanced certificate request
Now Submit a certificate request by using……

Now paste in your CSR data, select Web Server and click Submit, select base 64 encoded and download certificate, save
it locally;
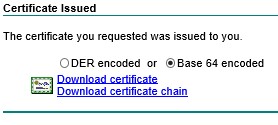
Then go back to ISE and click on Certificate Signing Requests again, you will see the CSR that you just generated;
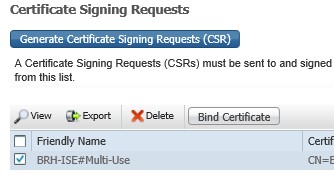
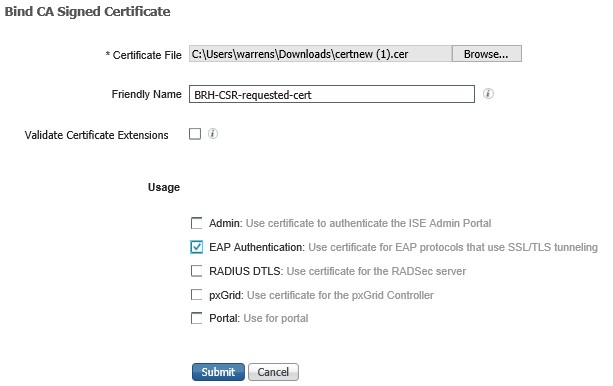
Select your CSR and click on Bind Certificate and click submit;
Device Administration Control
Now you need to enable both Radius and Tacacs+ for your switch, radius for dot1x and tacacs for logins.
Goto AdministrationèNetwork ResourcesèNetwork Devices, select the device and then scroll down and check both the Radius Authentication settings and the TACACS+ Authentication settings, enter the shared secret for both and click save;
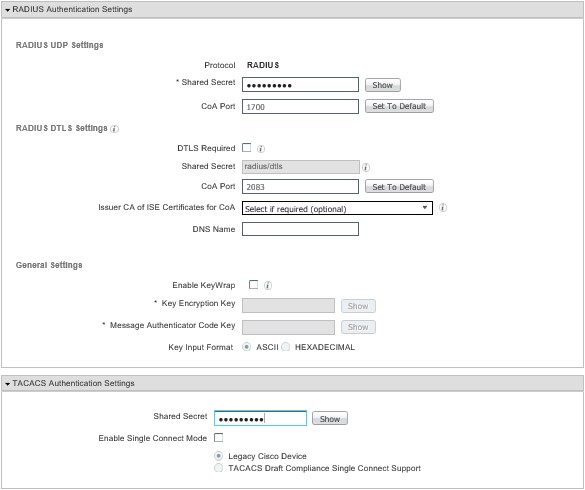
If you get an error about illegal characters when you try to save, delete the device description that SNMP has picked up from the IOU device. Then same J
Now configure your network switch to use TACACS+
|
username cisco privy 15 password cisco enable password cisco ! aaa new-model aaa authentication login default local group tacacs+ tacacs-server host 10.4.1.250 key Mi55ionG0 |
Now the default behaviour if you try to login now will be to block your login, this is because the default Authorization policy in the “Device Admin Policy Set” is set to block.
For this lab we will create some new stuff to get it working, leaving the default policy to block, as you do.
So go to Work CentersèDevice AdministrationèPolicy Elements
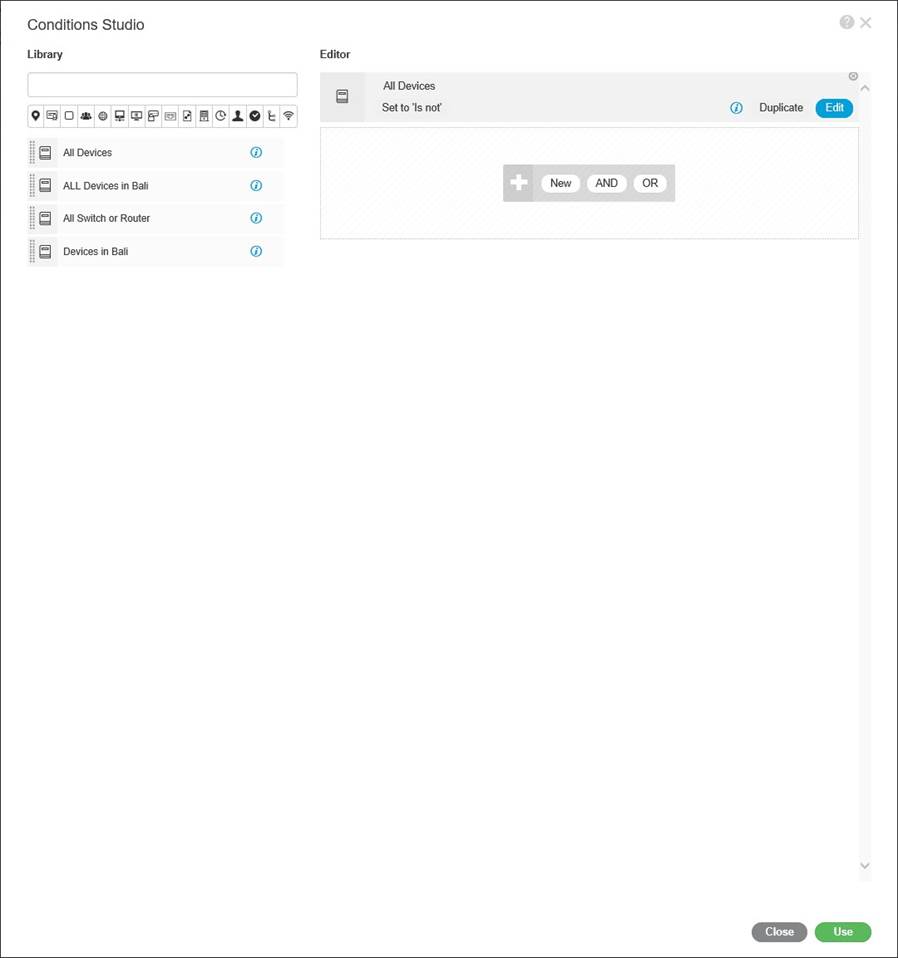
Now this screen is a little weird at first look, this is “Library Conditions” on the right is an editor, on the left is the library, the purpose of the screen is to define objects using various variables, is it this device, does it come from this or these specific locations, is it this type of hardware etc, you then use these Library “objects” in policy.
As you can see below, I have clicked in the top greyed out bar on the right hand side, a popup window is presented, scroll across the little icons to select the attribute, then a list will expand below, select option for that attribute;

Now you are presented with a condition, you just have to fill in the detail, note, the “Set to ‘Is not’” this is a little misleading, well it was for me anyway, what this means is, Click here if you want to negate the condition;

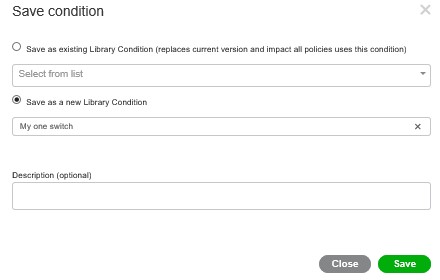
Enter the condition detail and click “Save”;

Now save as a new Library condition;
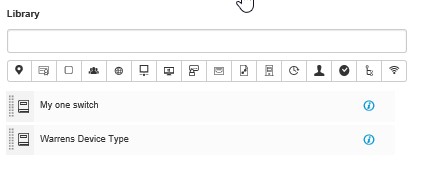
Your Library conditions appear on the left;
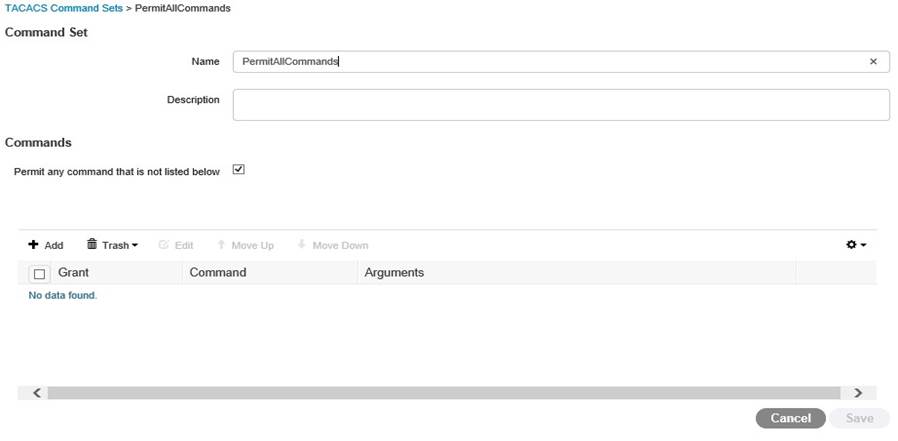
Now expand results and click on TACACS Command Sets, you will see there is only one Set, DenyAllCommands;
Click on add and type in some stuff! For now I have created a permit all command set, we will look at Command Sets later in this document;
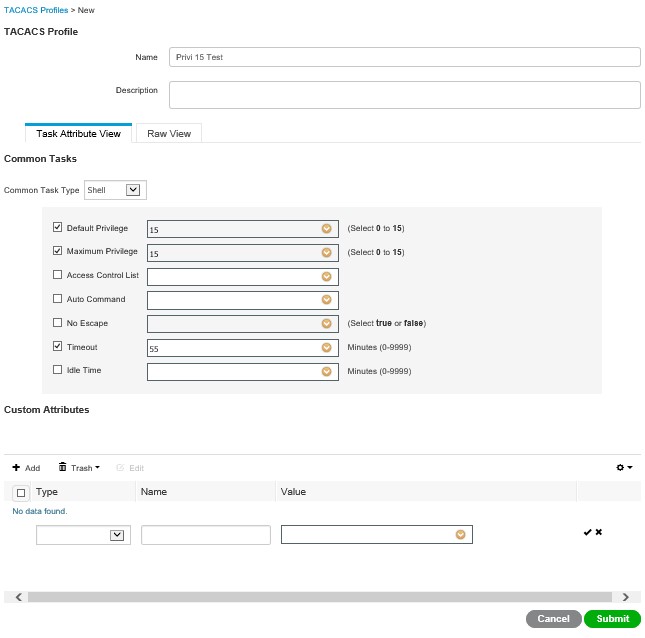
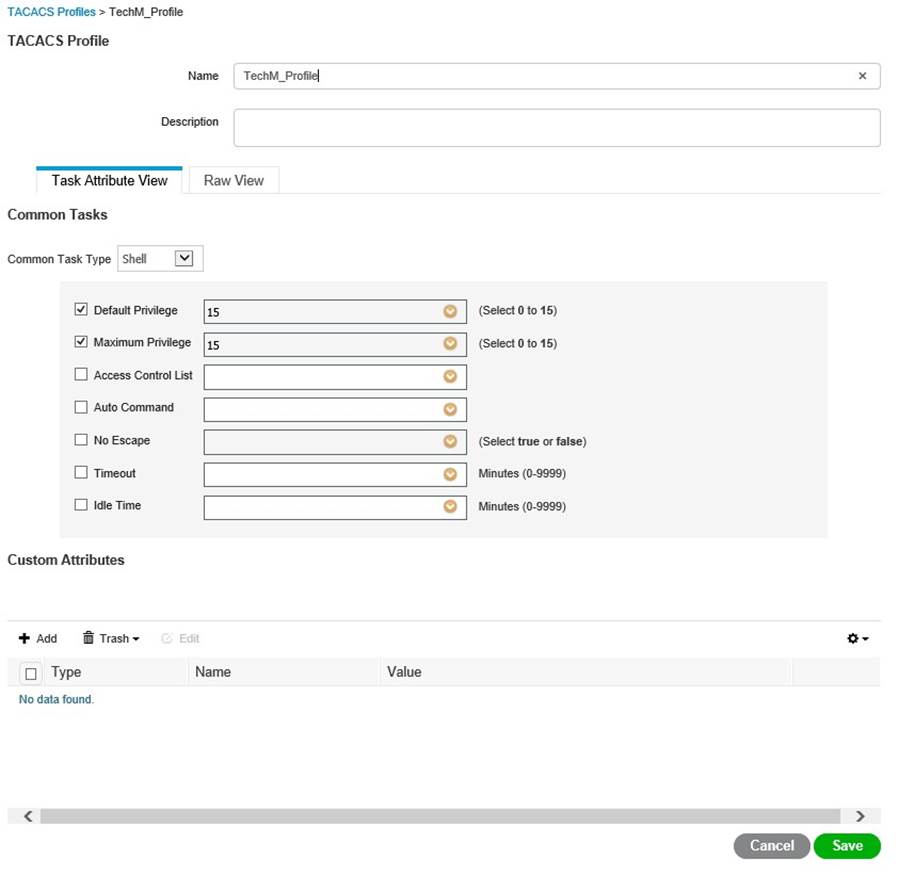
Now click on TACACS Profiles, this defines your access privileges amongst other stuff, click add and have a play! This looks like it sends AVPs (click on RAW View) Submit when done;
Now go to Device Admin Policy Set and click add, and rename it accordingly;

Now click on the big + symbol in the middle of your new policy and add your Library Condition;

Now expand the policy using the Greater than symbol on the right, here you can set your identity source, your command sets, and profiles you created earlier, Click Save;
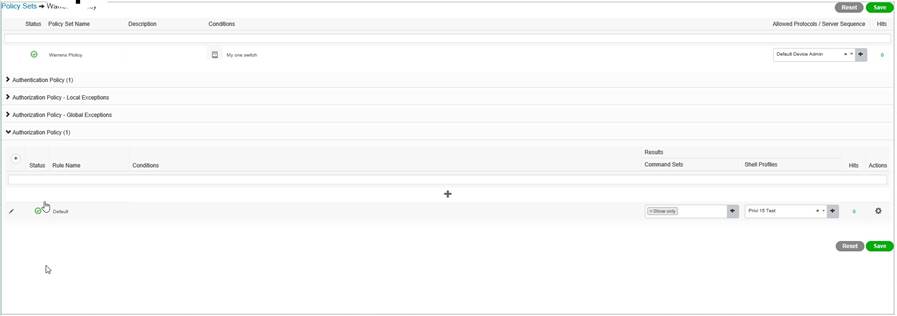
Test your login, do this from exec first before you log out;

And have a look on the right hand side of your policy, it has a hit counter (right click to refresh)!
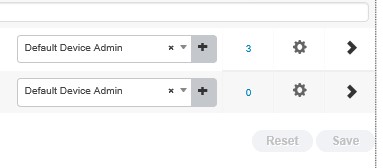
Now the big one, log out of the switch and log back in with your AD credentials!
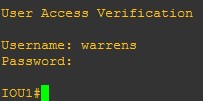
Yay!!
If you are having troubles, goto OperationsèTACACSèLive logs
Click on the little detail document for in depth detail on the transaction J
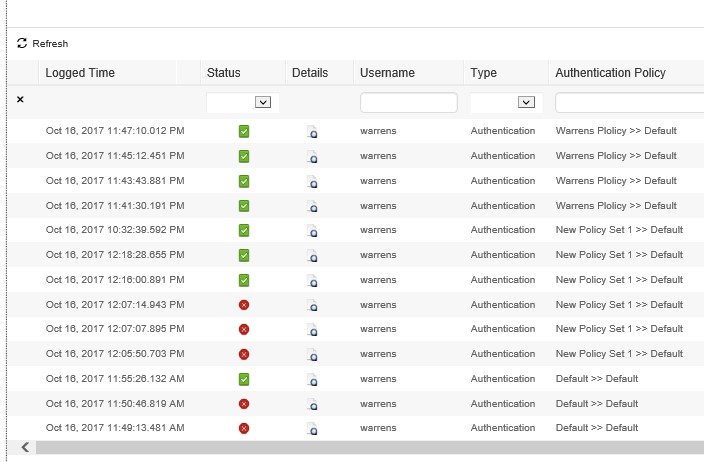
You have successfully setup ISE to authenticate your network device logins, give yourself a pat on the back!
Dot1x
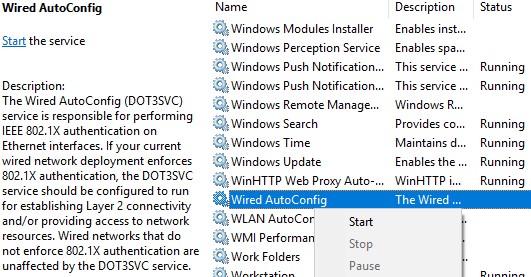
This is actually pretty straight forward, first of all, turn on your test Win 10 box, which is domain joined, go into services and start the “wired auto-config” service.
Now on the switch;
|
aaa authentication dot1x default group radius aaa authorization network default group radius aaa accounting dot1x default start-stop group radius ! dot1x system-auth-control ! radius-server attribute 6 on-for-login-auth radius-server attribute 8 include-in-access-req radius-server attribute 25 access-request include radius-server dead-criteria time 5 tries 3 radius-server host 192.168.99.250 auth-port 1812 acct-port 1813 radius-server key Mi55ionG0 radius-server source-interface vlan 1 ! |
Now on the port connecting to the host;
|
Interface e0/1 switchport mode access authentication port-control auto mab dot1x pae authenticator end |
Now confirm that the device authenticates and connects, verify in OperationsèRadiusèLive logs;
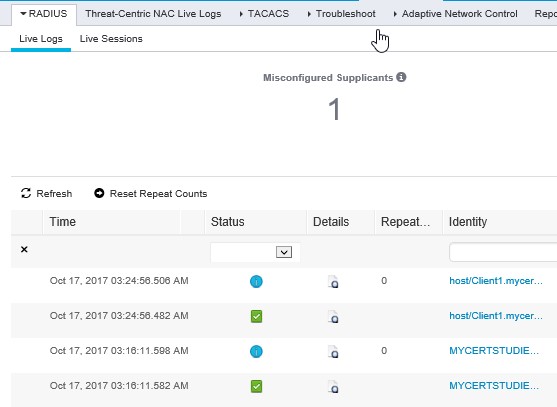
You now have a fully functioning Radius and Tacacs lab!
Now this should work, for some reason, in my lab, I had to restart both my DC and ISE, I’m sure this is just a lab thing, after both restarted all worked great!

Command Authorization
Now this took a bit of mucking around, everything in my intended deployment relies on AD group membership for authorization, and I could not get ISE to retrieve groups from AD, I have multiple people on our team look at it, years and years of experience, and it came down to one thing, one little thing……..browser! IE11 would not display the groups! Anyway rant over, heres how to do it;
Design
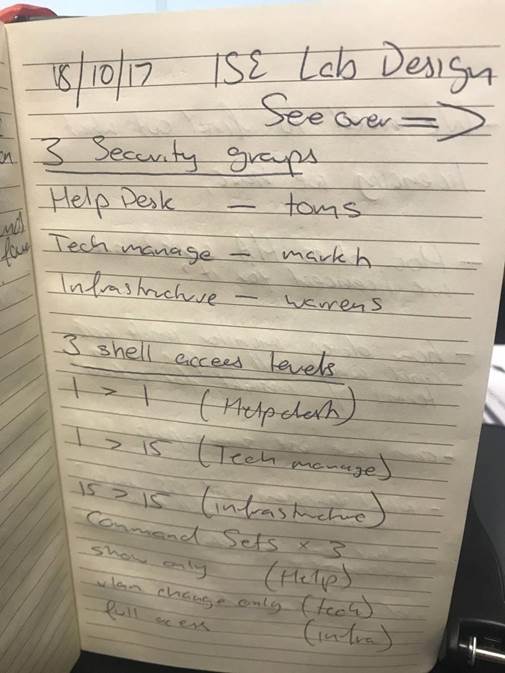
Command authorization, its granular, its fidly, its fun!, but just like the original topology, you need a plan, otherwise you WILL get lost, heres mine for this lab…..simple stuff, but documented none the less!
Network Configuration
Now, jump on the console of one of your switches, save the configuration before you start, that way if you stuff up, you can just reload via GNS3 to get access back!
Adapt and paste the below configuration into your network device/s;
|
! aaa authentication login default local group tacacs+ aaa authorization exec default group tacacs+ local if-authenticated aaa authorization commands 1 default group tacacs+ local if-authenticated aaa authorization commands 15 default group tacacs+ local if-authenticated aaa accounting exec default start-stop group tacacs+ aaa accounting commands 1 default start-stop group tacacs+ aaa accounting commands 15 default start-stop group tacacs+ ! ! aaa authentication dot1x default group radius aaa authorization console aaa authorization config-commands aaa authorization network default group radius ! aaa accounting dot1x default start-stop group radius ! |
AD Configuraiton
I Created the following in AD to support my design;
|
User |
Security Group |
|
Warrens |
Infrastructure-SG |
|
Markh |
Techmanagement-SG |
|
Toms |
Servicedesk-SG |
Then you go to ISE and import those groups;
Goto AdministrationèIdentity ManagementèExternal Identity SourcesèActive Directoryèleft click on your AD; Along the top row click on “Groups”

Click Add then Select groups from Directory, retrieve groups (filter if you wish) and select the groups you want and click OK;
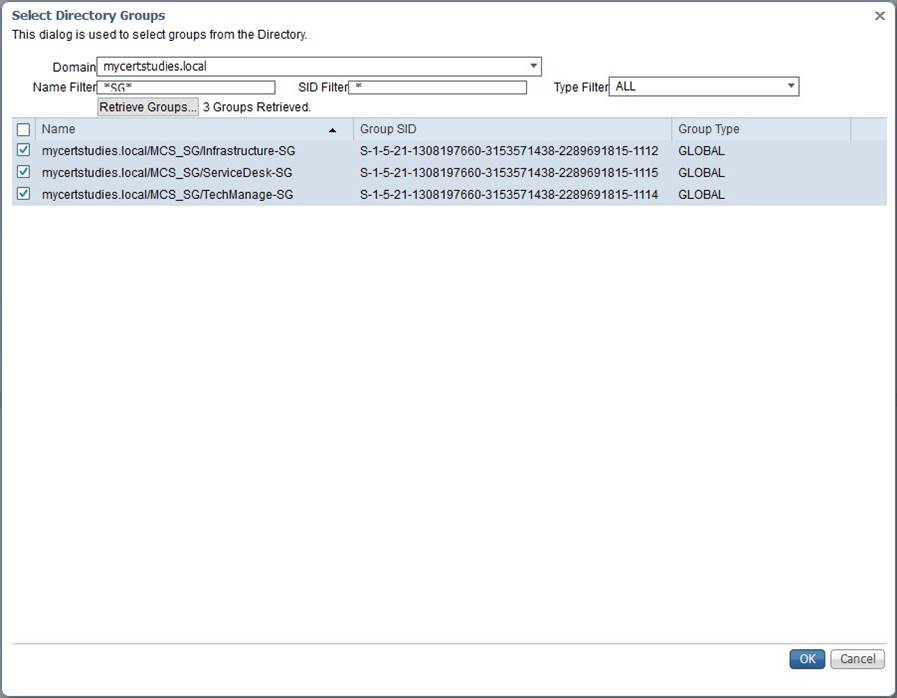
And then you end up with the groups in ISE, YOU MUST CLICK SAVE!!

You can now use these groups in your policy, so let’s start building it!
Policy Configuration
Policy Elements
We need to create policy elements (otherwise known as objects) for these AD Groups, Goto Work CentresèDevice Administrationè Policy Elements;
Now again, this screen looks terrible at first glance, it’s a bit buggy (at least in my browser) but once you learn how to use it, it’s actually quite nice and quick to use;
Click in the greyed out section Click to add an attribute

Across the top of the pop-up you will see various icons, hover over them for more information;
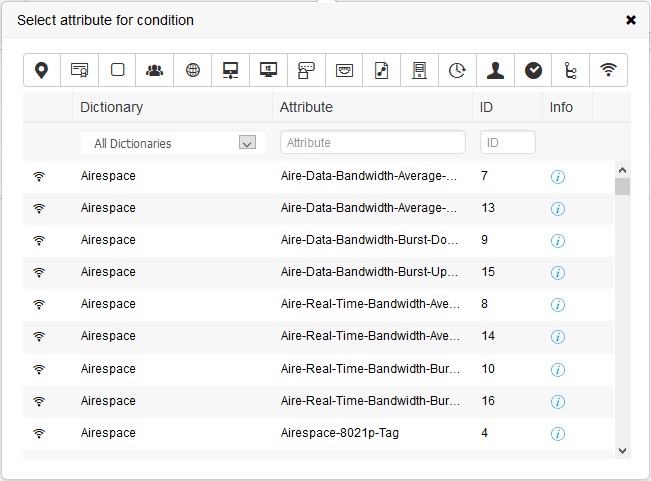
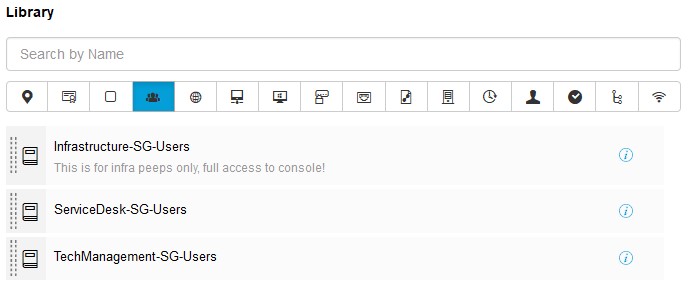
Click on the bunch of three people that’s the icon for Identity Group, once you click on it, the variables available below it will change, you will see your AD server there, click on it, now click on the remaining empty box that says Select from list (or words to that effect) choose your AD Group that you want and click SAVE, give it a name and click SAVE again;
This action will save the Policy element (object) in the library for use in policy, go and create the rest of the AD Group elements;
TACACS+ Command Sets
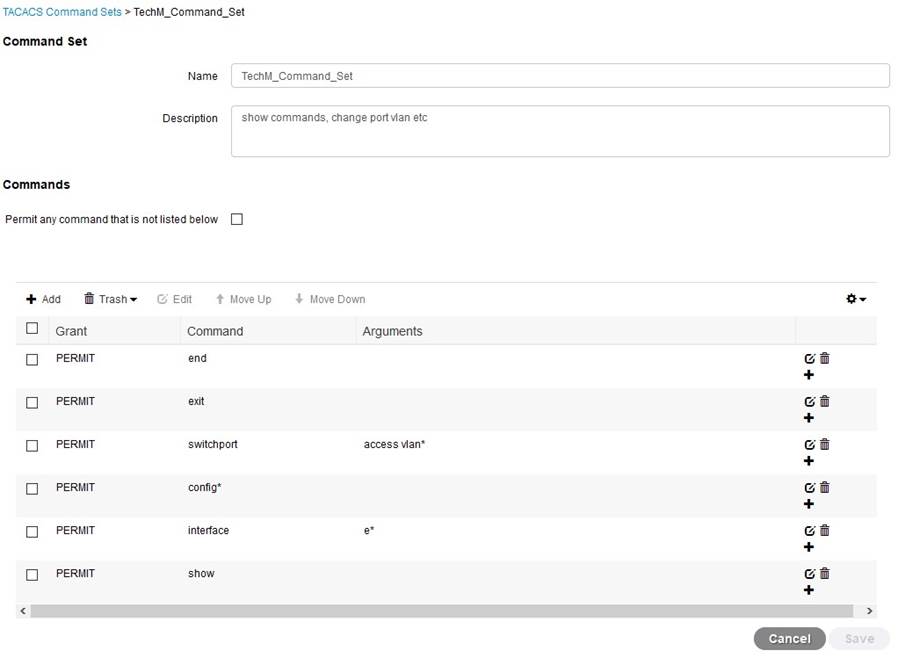
The main drawcard of this setup is the ability to control what commands people can commit on your devices, the potential is huge from a manageability perspective, from my design (lol, I use the term design very, very loosly) I want to create some Command Sets Elements, these tell ISE what a particular AD security group member is allowed to use on the device when they are included in a Policy Set.
|
AD Group |
Command Set permissions |
|
Infrastrucure-SG |
All commands |
|
Techmanagement-SG |
All show commands, allow port level vlan changes |
|
Servicedesk-SG |
Show commands only |
To do this goto Policy ElementsèTACACS Command Setsè Click Add
Give it a name, description and outline what the user can and can’t do in the command section, I won’t go into too much detail as it is fairly self-explanatory, and it’s cisco, so there is plenty of doco out there! See below for one of the Command Sets;
TACACS+ Profiles
Now TACACS Profiles, this is still a little confusing to me, so I’ll let you do the research and make your own mind up, but this is mine, I simply created one for each AD Security group we imported, this is the Techmanagement one;
Device Admin Policy Sets
Now, time to create the policy itself!
Goto Work CentresèDevice AdministrationèDevice Admin Policy Sets
Now you start with just one policy, you need to create a new one, click on the sign and rename accordingly, then click on the sign to the right of the name, for ease of configuration, select the all devices element you created earlier in the guide you do this by dragging the element from the library on the left to the editor on the right, then click USE;
Then in the Allowed Protocols / Server Sequence drop down, select the Default device admin from the drop down, click Save;
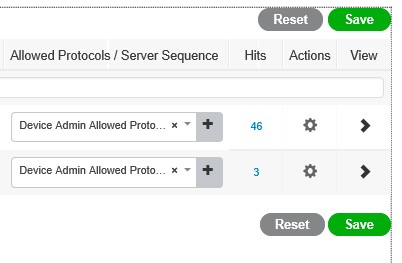
Now see that > sign under View? Click on that to expand out your new policy, now you can see that you have an authentication policy, and an authorization policy;

Expand your Authentication policy and change the authentication source to your AD and click SAVE;

Now expand Authorzation, this is the big one, this is where you separate our your AD Security Groups, now by this stage in your lab you should be all over this, so I wont go through it blow by blow, but here is a screenie of my setup;

Now MAKE SURE YOU SAVE IT!!!!
Testing Phase
Go to your network device, login as the three users you created, verify that the commands that are supposed to work, work, and anything else does not, look through the logs, generate some reports around command authorization, have a play, it’s a very very powerful tool with tonnes of granular potential.
You are done, you have a working 802.1x and TACACS+ lab!
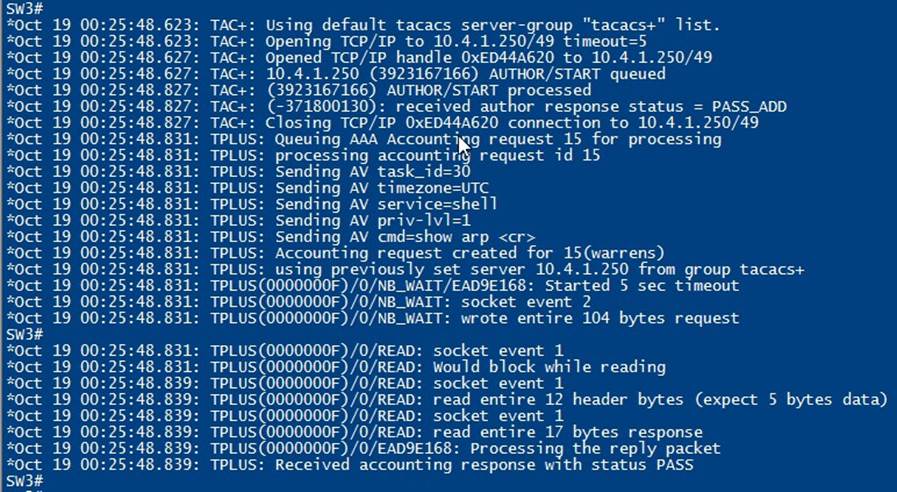
Pssst, go into your switch and use debug to watch the TACACS+ transactions! Pretty cool!
Conclusion
Whilst this lab is full of errors from a Windows, IP networking and ISE perspective, it should be good enough to give you a start in the world of Cisco ISE, that is exactly what it has done for me, I have literally never touched Cisco ISE before this lab, I have a licenced VM ready to be installed in our production environment and this was my method of learning it!
If you have any questions queries or doubtful points, feel free to ask……google J


